12.29.2011

Pee Pee Teepee

I decided to make some pee pee teepees. I followed the directions found here I had a lot of fabric from some botched burpcloths that I didn't measure properly and didn't know what I was going to do with it. The material that I used is flannel inside and out. These things are so easy to make. I made 21 of them. Do I need 21? Nope...but I had enough fabric to make that many, so that's what I did :)


I didn't even bother to pin them after the initial pinning around the curve, which makes it that much faster to sew. Anyway, if you have a little sprayer, or know someone who does, these things are pretty cool.

Oh, the bowl I used was just a regular sized cereal bowl.

Happy Sewing!

Apple

12.27.2011

Burp Cloths

I actually made these a while ago, but never got around to posting them. A friend of mine is having a little one too, so I made a few for her. I got the template from here but made a couple of changes. On my first burp cloth I did it exactly as she said. It took too much time and hurt my hand from the constant clipping so I decided to sew it together. I like the way it looks much better and it was just easier for me.

Make sure you layer it right, or you'll be like me and want to scream because you sewed everything together only to realize that you put it together wrong in the first place and when you flip it out your batting is on the outside! I was so mad when that happened. I have to admit that I didn't sew for several days after that because I was so angry (I'm sure pregnancy hormones had something to do with that *wink*)

Anyway, here's what I did:

1. Place fabric right sides facing with batting on top.
2. Sew all the way around leaving approximately three inches opened at the top so you can flip it right side out.
3. Flip, then pin opening closed and sew all around closing the opening as you go. Then I sewed a line through the middle as suggested to catch the batting and voila! Done!

They are very nice and soft. I have made 16 so far, but I've cut out enough for 32. Apparently, I was very ambitious at one point :)

Here's how they look:

Front:


Back: 

Front and Back: 


Happy Sewing!

Apple

12.21.2011

Snowman Ornaments

I'm coming down to the last few ornaments now. I found the idea for this snowman here and thought it was cute. Now I just need a star for my topper...

Here are our snowmen:

This is mine (it looks like it got into a fight with another snowman though because I kept touching the paint while it was still wet):


This one belongs to my little one: 

This one is my hubby's: 

I have to admit, my husband surprised me with this whole ornament thing. He did a really great job creating his ornaments. I think his snowman is cuter than mine (shh...don't tell him I said that) :-) But the winner of overall cuteness goes to my little one. Those are some of the cutest things I've seen!


Apple


12.20.2011

Santa Ornaments

Next on my list of ornaments is the Santa ornament. I think they look pretty hilarious. My husband's actually looks the best, but they still look funny. But that's what makes these sort of projects so fun and special. I used the template from here and again just copied it onto craft foam and cut it out. Here's what the finished product looks like:

This is my hubby's:


This is my little one's:


This is mine: 


Somehow my Santa ended up bearing a strange resemblance to Michael Jackson. I'm not really sure how that ended up happening, but it's there. Do you see it?


Apple

12.19.2011

Gingerbread Man Ornaments

We made Gingerbread Man ornaments! They look real. I don't know if it will really come across that way in pictures, but in person they look awesome! I'm very happy with the way they turned out. I used the template from here, resized it, copied it onto brown craft foam, and cut it out. I used puffy paint (dimensional paint) for the icing. It was a lot of fun doing these. Here's how they turned out:


This picture really doesn't due them justice. But make some for yourself and you'll see how cute they really are :-)

Apple

12.17.2011

Reindeer Ornaments

In my last post I said that we were doing a family tree this year where we'll make the ornaments. I was planning on making snowflake ornaments, but just decided to hang up some of the snowlake ornaments that I already had. Maybe next year we'll make them. Anyway, we did make reindeer. They turned out really cute. I used the template from here. I resized it, printed it out, traced it onto brown craft foam and cut it out. We just used buttons, pom poms, googly eyes, and marker to complete them. I punched a hole in the top, threaded ribbon through it and hung it on the tree. Here's what they look like:

This is mine:

This is my little one's: 

This is my hubby's: 

They turned out really cute. They're the perfect size and look nice on the tree. Next up...the Gingerbread Man!

Apple

12.02.2011

Still Here

Hello everyone. I just wanted to let you know that I'm still here. I hope everyone had a wonderful Thanksgiving. We had a lot of yummy food to eat. I am going to post a couple of pie recipes when I get the chance, but for now I just wanted to write a little something since it's been so long since my last post. Posting is going to be a little thin for a while because I'm sure you may have picked up on my recent talk of baby stuff that our family has expanded and getting on the computer is not the easiest thing to do right now (when I have an extra minute I'm usually trying to shower at lightening speed).

I have lots of plans to make things for Christmas, but we'll see how that goes. My plan is to buy a real tree this year on top of our artificial tree. The artificial tree is going to be our "fancy" tree and the real tree is going to be our family tree. I want to make homemade ornaments and a popcorn garland. After Christmas, my plan is to put the tree outside with some peanut butter and bird seed sprinkled on it for the little critters outside.

I've recently discovered pinterest and there are a whole slew of things I want to make. All of them simple, but fun for little ones to make. I've also found a blog that I love and there are some really cool ideas for Christmas. One of which I plan to make for my friends and family as a family Christmas gift this year, but they'll be able to use it year after year. I'll be sure to get that posted too. So many plans, so little time...but at least I have a plan right?

Talk to ya soon!

Apple

10.26.2011

Mop Horse

In my last post I mentioned the mop from the pirate party and what it has become. Well here it is and this is how I made it.

Take the string and divide it into thirds. The bottom third will be the nose, a small section will be the ears and the rest will be the mane.

Tuck the bottom third under and secure with rubberbands. Twist the ears and secure the base with more rubberbands. Leave the remaining string hanging for the mane. It will look like this...

The last few steps are just as easy. Using your glue gun take some ribbon to cover the rubberbands. My ribbon was too wide so I just used one strip to cover the bottom ribbon. I used my googly eyes to cover the top rubberband. I just glued the "bridle" directly to the handle. Here is the end result. Isn't it cute? It looks like she's looking directly at the camera.


The handle is too long so I need to cut it down a little, but other than that this was a super quick and easy project. It took about 20 minutes from start to finish. Now I just need to make a felt cowboy hat! But that is not going to happen anytime soon :-)

I hope you make this little horse friend. It's a nice thing to do with an otherwise useless product (this is a dollar store mop and has very little "umph" to it).

Apple


10.24.2011

Paper Chain

So my little one has been asking me lately when are we going Trick or Treat. The concept of a week and a half is a little hard to understand for a little one so the best way to teach this (in my opinion) is a paper chain. So since it is October, I decided to use autumnal colors. This paper chain is going a little beyond Halloween because my mom is coming to visit soon so this will also show when "Grammy" is going to be here.

This really is a simple project and I'm sure most of us remember doing it at least once in elementary school.

Take your construction paper, and cut it into 2" strips.


Have your little one color on the strips or embellish however you want. I decided to add little pictures to help make it all a little easier to understand.

Make your first link into a circle and glue together. Then just start linking them together and glue as you go along.


Hang and enjoy!

We will be ripping off a link as each day passes to show that the big day is almost here.

Notice the mop in the picture? That is the mop from the pirate party. I am tired of seeing it all over the house so I decided to make something out of it. Keep your eye out for what it has become :-)

Apple

10.21.2011

Carseat Cover/Canopy


I have finally made the carseat canopy that I mentioned quite some time ago. I'm actually making a few, but this is the first one and I wanted to get it on here. I used the tutorial found here, but I did my straps a little differently and measured my placement of the straps wrong. On my next cover, I'll be sure to measure properly :-) I measured my straps 18" down and 10" in.

To make my straps, I didn't want to use velcro so I just figured I would tie my straps to the carseat. My straps are approximately 1 1/2"x25". Here's how I did it:

 
 I started off with two pieces of fabric that are 5"x25".


Fold fabric in half lengthwise and press.

Unfold what you just did and fold fabric into fourths, press.


Take the top corner of each piece and fold it toward the center line and press. It should look like you are making a paper airplane. Do this to both ends.


Fold the entire strap in half again and press. This is what is should look like:
Stitch around the open ends of the straps and you're done. Sorry if this sounds a little complicated. It really isn't, I just couldn't figure out a better way to explain it.

Measure your straps to the proper placement on the cover and stitch in place.

And you're done! Here's what it will look like in the end:


I used minky fabric for the interior. It's nice and snuggly and could be used as a blanket also.


Apple

10.03.2011

Pirate Party

Well the party was a success! Everyone had so much fun! There were a few last minute projects to do. The night before the party I remembered that I didn't make the maps...oops! Here are pictures and I will explain as I go along.


Treasure Maps:

Get a piece of card stock, tear the edges, and crumple into the tightest ball you can get. Flatten out as much as possible. 

I had to make five: 

Soak the paper in coffee or tea for about 5 minutes.  

Take out of the coffee very carefully and lay on cooling rack. Dab excess liquid with a towel. Use blow dryer to dry. 


Burn edges.

Draw your map. After I took this picture, my husband drew a compass on the  map in the upper right hand corner. Each X on the map matched the child's hat color.

Here are a couple of the clues that I printed out and laminated because it was kind of damp outside. I love this font. It looks piratey.


Remember I said that each child was going to have their own X? Well I laminated those too.  

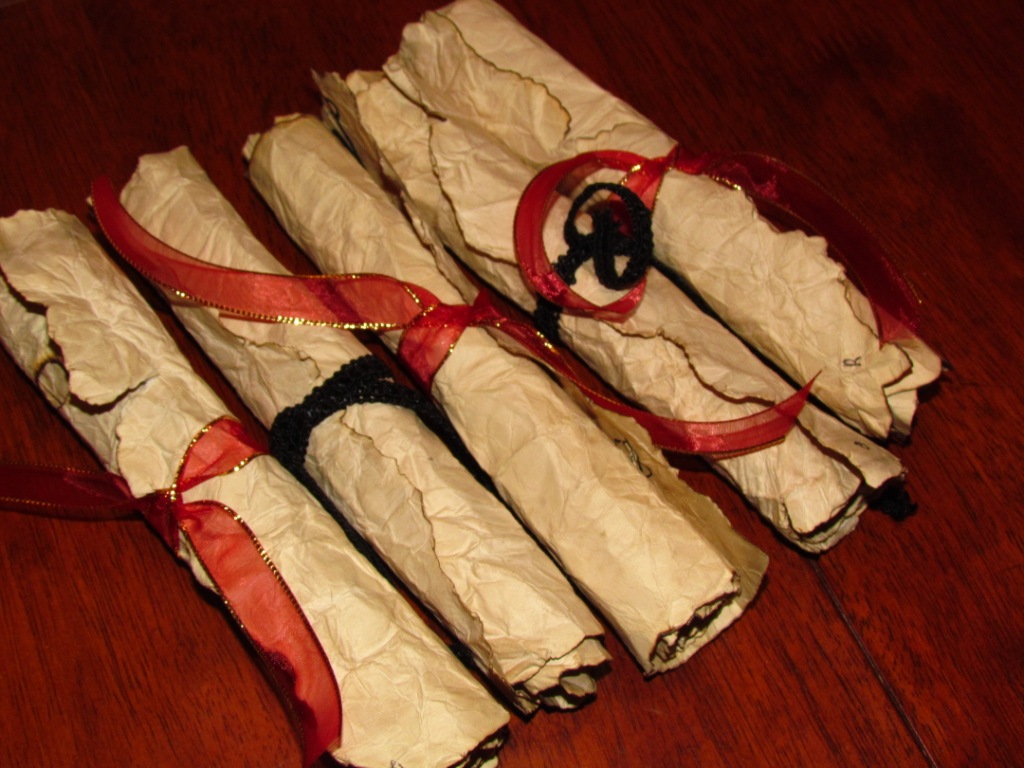
Here are the maps rolled up and tied with ribbon. 

Here is the bird that the kids had to find. I laminated it too and attached it to the side of the shed.  

Here are the treasure chests that the kids had to find. I put them in plastic bags since they were going to be in the straw and there was candy inside, I didn't want any bugs possibly getting in there. I think they actually look nice in the bags. They look like gifts to me.  

My husband painted the portholes. He did an awesome job! 

He also painted the crocodile. Again, awesome job! He found this image online and printed it out. We have a little projector and he just projected the image onto the posterboard and voila! Easy crocodile. 

Here is a fishing net we hung up. We also glued sea shells onto the net. It turned out really cool! 

Here are the  portholes up on the wall:


Here is the "mean" old croc. We cut a hole out of the mouth and that is obviously where the kiddos had to throw the beanbags. I didn't make the toss board. We had one in the shed. But if you want to make one out of cardboard just click here.

Here is the cake that one of the mama's made. It turned out really cute! 

Finally, I just took some crepe paper and hung it in strips from the ceiling. The kids also thought this was cool.  

So thats it! The kids had so much fun finding the next clue and getting their costume along the way. When they got to the front yard and found their treasure chests, the took them, handed them to the parents and had fun playing in the straw. They played in that for a long time with no interest whatsoever in their treasure. When we came back inside, they opened the chests and were excited with all of the goodies inside. Then we all ate cake and everyone went home. It was a nice time!


I hope I was able to give you a lot of good ideas if you want to throw a pirate party of your own!


Apple