Showing posts with label Craft. Show all posts

6.17.2012

No Sew Cart Cover

I don't know why I have such a hard time going shopping by myself with a new baby or babies. With my first born I didn't feel completely comfortable with going somewhere with a little baby until the six month mark. The same thing happened this time around. But now my little ones are older and I come and go all the time with the three of them. The only place I can't go by myself is Sam's. The carts are huge and it's impossible to push a double stroller while pulling that giant cart with my oldest sitting in the front of that one. So I figured the only way I would be able to conquer Sam's by myself is with a cart cover. I'm a bit of a germophobe..some would say I am more than a bit of a germophobe :-)...so I needed something ASAP. I didn't want to spend a lot of money on a cover because I just needed one for Sam's. I saw a no-sew cart cover on Pinterest and decided to make one for myself. The only problem is I didn't have the dimensions of a double cart. So what did I do? Well since I didn't have the nerve to go and actually measure, I called them. I know I probably sounded crazy asking this but here's how it went...

Sam's: Thank you for calling Sam's Club how may I help you?

Me: Hi, I have kind of a strange question, but do you know how wide your cart seats are because I want to make a cover for my kids.

Sam's: Uh...I have no idea...could you please hold while I have someone check?

Me: OK.

(Three minutes later...)

Sam's: Umm, everyone is guessing about three feet.

Me: OK. Thanks!

Sam's: You're welcome ~chuckle~

When I got off the phone I felt kind of dumb for calling them, and figured during the three minutes I was on hold they probably had a good laugh. But I have to say, this all happened AFTER I looked online to try to find the dimensions. So the next step in this process was to actually measure because three feet seemed excessive to me. We left the house (hubby was with us) and went to another store by Sam's. Since we were so close my hubby suggested we go and measure the cart. I didn't want to and here is how that conversation went:

Hubby: Why don't we just go? We're right here! You'll be happy that you have the actual measurements!

Me: No. What are we going to do? Just pull up next to a cart and try to measure? Don't you think that's gonna look kind of shady? Anyway, what do we have to measure it with?

Hubby: I don't know...look in the glove box.

Me: The only thing in here that we could maybe use is a bank deposit envelope.

Hubby: OK.

So we pull into the back of the parking lot where a stray cart is parked. I tell hubby he's gonna measure it because it was his idea to do this.

Hubby: Fine...I don't care.

Me: What if someone asks us what we're doing? They'll just see you standing there with an envelope in front of a cart and you'll say "Oh I'm measuring for a cart cover". They won't believe you...

Then I start laughing because he looked at me like I was crazy. Anyway he's measuring away and tells me to start speaking into the phone with the talk to text. So I did and it kept coming up with some really funny things that weren't even close to what I was saying. So then I call home and leave the message on my voicemail and we proceed on to Joann's.

A couple of days go by and I notice Hobby Lobby has Simplicity patterns on sale for .99 so I decide to look through my patterns before I buy more. What do you suppose I find? A PATTERN FOR A DOUBLE CART COVER!!! All I could do was laugh. So I put the pattern on my fleece and cut out the leg holes. That's the only thing I needed to know out of this whole ridiculous process! Which by the way I looked "double cart cover" up online too and the only thing I could find was patterns with two leg holes not four that was big enough to cover a double cart.

Anyway, here's what I did:

I cut my fleece 56"x56". Measure up 18" and this is where the bottom of the leg hole begins. I folded my fabric in half for the cutting of the leg holes. Go in 1" from the fold and cut a 5"x5" square. Go over 1" to the left and cut another 5"x5" square (although if I were to make another one I think I'd go over 2"). From the center of the leg hole measure up 12" and make a 3" slit. Repeat for other leg hole. This will give you a place to pull the straps through from the cart.

Now you're ready for the ties. While your fabric is still together cut a 4"x4" square out of the end corners (NOT the folded side!). This will make everything look tidier when you're finished. Then just start cutting 4" high by 1" wide strips all the way around. Then open it up and start knotting.

I know this says no sew, but I did sew...I had to do some reinforcing. All of the cut areas seemed too flimsy so I basically did a zigzag stitch around the leg holes and the slits for the buckles. Now it's all done...finally! So I had to try it out. I really had no reason to go to Sam's other than to see if everything turned out OK. So here we go again...

Me: We need to get out of here before they close!

Hubby: Do we actually need anything?

Me: No.

Hubby: ~Blank Stare~

We get to Sam's...

Me: Start getting them out of the carseat while I get a cart.

A few carts later...

Hubby: What are you doing?

Me: What is the deal with these stupid carts? The first one only had three belts, the second one had four belts but one of the buckles is broken. Oh, here's one where the buckles are fine...wait a minute! It only has one seat thing! Whatever, lets just put them in there so I can take a picture.

Hubby: OK.

Babies get put into the cart and I take a picture, then my oldest says, "Can I get in?"

Me: Yeah go ahead. We're gonna go in.

Hubby: I thought you said we didn't need anything.

Me: We don't but I don't want to be seen putting on a cart cover and taking pictures then getting in the van and leaving. I'm sure there is something we need.

Hubby: ~Silence~

A few minutes and a pack of Pepsi later...Here is the cart cover:


Wasn't it worth it? You can actually tie the little ties to the cart so it won't move. I think I'm going to sew a little loop to the top so toys can be attached, but as for now I'm done with this project!

I have the dimensions to the cart and I will post that info seperately in a post called "Double shopping cart dimensions", so that if some poor mom is looking for that information, she won't have the same crazy experiance that I had.

Although it is kind of funny!


Apple

6.10.2012

Felt Chore Chart

Wow, it's been a long time since my last post. I've been busy with my little ones and have had no time for crafty things. It's amazing how much a house can get out of order from pregnancy through birth. Well now my two new little ones are a little older and it's getting easier to do things. I have been playing catch-up with house work and I'm slowly getting everything organized again. Now my oldest little one is at an age that chores will be introduced, it really isn't anything big but simple little things that will teach responsibility. I saw a felt chore chart on pinterest and thought it was a really cool idea. The instructions are here if you want them. I didn't follow the instructions, I just modified it to my liking.

My large felt piece is 18"x19", then folded it down about 2" to make a rod pocket. I purchased printable fabric and printed out images since my little one isn't a reader yet. After I printed the images, I cut them out with pinking shears and sewed everything together. You can see how I pieced everything here:


I decided to add a few more embellishments:


The green is for feeding the pets and the orange is for setting the table:


The yellow is for picking up toys and the blue is for putting clothes down the laundry chute at night.


This is how it looks hanging up...pay no attention to my upside down "S" for Saturday ;) 


It took me a couple of hours to pull this together because I sewed everything, but it was worth it. I think it turned out awesome!

So the concept is everyday a particular chore is done the coordinating stick gets put into that day. At the end of the week an allowance will be given. We will be giving real money and "home" money. Home money can be used for goodies that I will have like fun size candy bars or stickers. Home money can also be traded in for real money for the piggy bank. I want to teach the concept of saving, but also I want there to be a lesson in spending (hence the "home" money).

I'm looking forward to trying this. I haven't been particularly successful so far in getting my little one to pick up toys, so we'll see how this goes!

I hope you try this with your little one!

Apple


12.21.2011

Snowman Ornaments

I'm coming down to the last few ornaments now. I found the idea for this snowman here and thought it was cute. Now I just need a star for my topper...

Here are our snowmen:

This is mine (it looks like it got into a fight with another snowman though because I kept touching the paint while it was still wet):


This one belongs to my little one: 

This one is my hubby's: 

I have to admit, my husband surprised me with this whole ornament thing. He did a really great job creating his ornaments. I think his snowman is cuter than mine (shh...don't tell him I said that) :-) But the winner of overall cuteness goes to my little one. Those are some of the cutest things I've seen!


Apple


12.20.2011

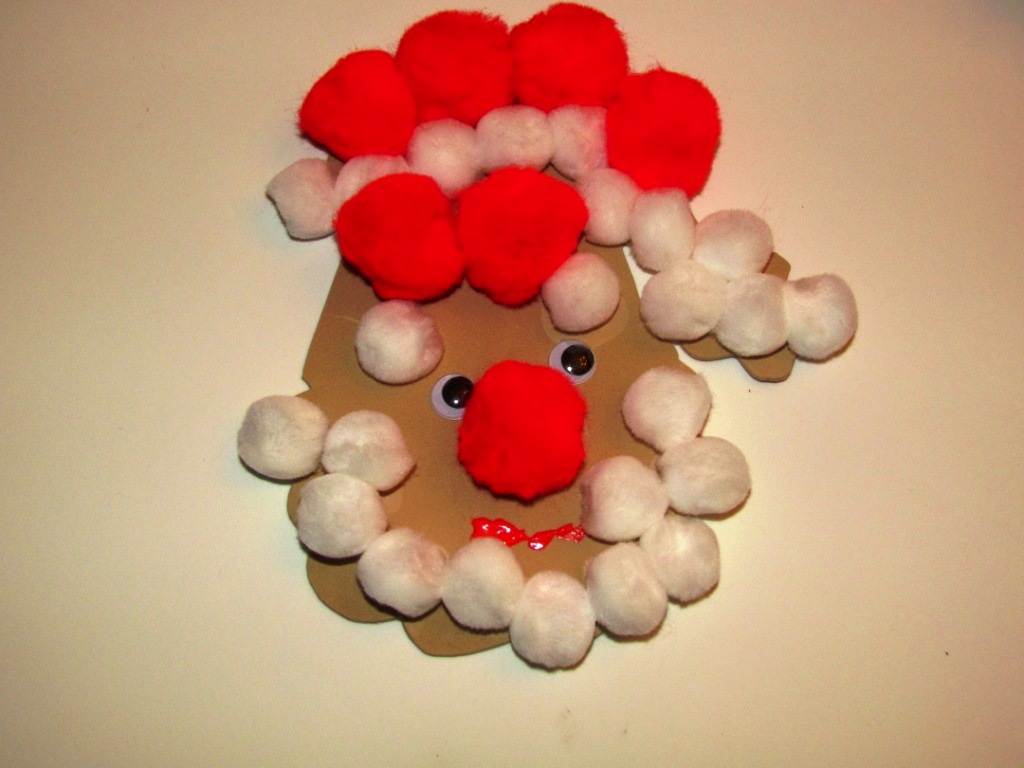
Santa Ornaments

Next on my list of ornaments is the Santa ornament. I think they look pretty hilarious. My husband's actually looks the best, but they still look funny. But that's what makes these sort of projects so fun and special. I used the template from here and again just copied it onto craft foam and cut it out. Here's what the finished product looks like:

This is my hubby's:


This is my little one's:


This is mine: 


Somehow my Santa ended up bearing a strange resemblance to Michael Jackson. I'm not really sure how that ended up happening, but it's there. Do you see it?


Apple

12.19.2011

Gingerbread Man Ornaments

We made Gingerbread Man ornaments! They look real. I don't know if it will really come across that way in pictures, but in person they look awesome! I'm very happy with the way they turned out. I used the template from here, resized it, copied it onto brown craft foam, and cut it out. I used puffy paint (dimensional paint) for the icing. It was a lot of fun doing these. Here's how they turned out:


This picture really doesn't due them justice. But make some for yourself and you'll see how cute they really are :-)

Apple

12.17.2011

Reindeer Ornaments

In my last post I said that we were doing a family tree this year where we'll make the ornaments. I was planning on making snowflake ornaments, but just decided to hang up some of the snowlake ornaments that I already had. Maybe next year we'll make them. Anyway, we did make reindeer. They turned out really cute. I used the template from here. I resized it, printed it out, traced it onto brown craft foam and cut it out. We just used buttons, pom poms, googly eyes, and marker to complete them. I punched a hole in the top, threaded ribbon through it and hung it on the tree. Here's what they look like:

This is mine:

This is my little one's: 

This is my hubby's: 

They turned out really cute. They're the perfect size and look nice on the tree. Next up...the Gingerbread Man!

Apple

10.26.2011

Mop Horse

In my last post I mentioned the mop from the pirate party and what it has become. Well here it is and this is how I made it.

Take the string and divide it into thirds. The bottom third will be the nose, a small section will be the ears and the rest will be the mane.

Tuck the bottom third under and secure with rubberbands. Twist the ears and secure the base with more rubberbands. Leave the remaining string hanging for the mane. It will look like this...

The last few steps are just as easy. Using your glue gun take some ribbon to cover the rubberbands. My ribbon was too wide so I just used one strip to cover the bottom ribbon. I used my googly eyes to cover the top rubberband. I just glued the "bridle" directly to the handle. Here is the end result. Isn't it cute? It looks like she's looking directly at the camera.


The handle is too long so I need to cut it down a little, but other than that this was a super quick and easy project. It took about 20 minutes from start to finish. Now I just need to make a felt cowboy hat! But that is not going to happen anytime soon :-)

I hope you make this little horse friend. It's a nice thing to do with an otherwise useless product (this is a dollar store mop and has very little "umph" to it).

Apple


10.24.2011

Paper Chain

So my little one has been asking me lately when are we going Trick or Treat. The concept of a week and a half is a little hard to understand for a little one so the best way to teach this (in my opinion) is a paper chain. So since it is October, I decided to use autumnal colors. This paper chain is going a little beyond Halloween because my mom is coming to visit soon so this will also show when "Grammy" is going to be here.

This really is a simple project and I'm sure most of us remember doing it at least once in elementary school.

Take your construction paper, and cut it into 2" strips.


Have your little one color on the strips or embellish however you want. I decided to add little pictures to help make it all a little easier to understand.

Make your first link into a circle and glue together. Then just start linking them together and glue as you go along.


Hang and enjoy!

We will be ripping off a link as each day passes to show that the big day is almost here.

Notice the mop in the picture? That is the mop from the pirate party. I am tired of seeing it all over the house so I decided to make something out of it. Keep your eye out for what it has become :-)

Apple

9.06.2011

Pirate want a Parrot?

This is a super simple, easy idea for a parrot. I originally went to Michaels and they had songbirds with an attached clip for feet on clearance for $1 so I bought them and figured they would be good enough. But then I went to Hobby Lobby the other day and saw these flat little colorful parrots made from MDF or something for only .67. As I was looking at them I thought..."Why not attach a pin to the back of these things for the kiddos instead of using the songbirds?" It was a lightbulb moment. The kids are young so a bird sitting on their shoulder would probably annoy them because it would be rubbing their little faces too much. Whereas this idea can just be pinned to the shoulder of their shirts and not annoy at all! They were kind of plain so I prettied them up with some glitter glue and Voila! Cool parrots for the pirates!

This is what they look like:

 A closeup:

I just started gluing all around the outline of the feathers:


Here they are all glittered up: 

 Because I didn't think this out, I added the glitter glue before I attached the pins to the back. So I started applying the pins before the glue was dry. It was hard not to stick my fingers in the glitter glue because it was still wet. Needless to say, before I was done, I had glitter fingers. Anyway, I went to the jewelry making department and picked up these pins.

 Hopefully you can see what kind I used in this picture:

Add your glue:

 Attach the pin:

 Press firmly and you'll start to see the glue coming through the holes of the pin.

And here it is completed. I left the label on because it's like they super glue these things to the back and when you try to tear it off, you get one little piece at a time. So I gave up!

So there you go. Easy parrots for your pirates!

Remember the other day I said Kermit was going to be showing up in a future post? Well today is the day. I wanted to show how everything has come together and won't post pictures of my little one. So my husband came up with the idea of using this HUGE Kermit he won at an indoor amusement park about 12 years ago. I have to say Kermit doesn't look like he's aged a bit! He normally lives in our basement, but I took him out for a few pictures. So he's now Captain Kermit!


OK, so you can see now how everything is coming together. Notice how the belt ties on the side and how nicely it hangs while the buckle is nice and centered. I had to cover Kermits eyes with the hat, but you get the idea. Where human eyes would be is where the eyepatch is. My husband decided to have Kermit hold a kaleidoscope because its funny! The treasure chest is what the kiddos will be "digging" up when they find their treasure.

Up Next: What's in the treasure chest?
Apple