2.08.2012

Smothered Chicken

Last night I made something I haven't made in a long time...Smothered Chicken. It is pretty tasty. It's easy to make, but does take a little longer to make than some of the other meals I've posted. Here's what you need:

Chicken
Mushrooms
Spinach
Onions
Garlic
Bacon
Cheese

I'm not putting any sort of measurements on here because it all depends on how much you need for your family. Just use these ingredients and adjust to your taste.

1. Saute your mushrooms, onion, garlic, and spinach.


2. Cook and chop your bacon (I used turkey bacon)


3. Season and cook your chicken. Go light on the salt because when you put everything together, if you use your usual amount of salt, it will be way too salty. I only seasoned one side.


4. Cover your chicken with the mushroom mixture.


5. Cover with bacon.


6. Cover with cheese.


7. Melt cheese in oven.


8. Dish up and enjoy!


Apple

1.04.2012

Stuffed Shells

Update...I took pictures so here they are:

Last night I made stuffed shells for dinner. I had too much leftover meat sauce from a spaghetti dinner and was trying to figure out what to have instead of leftover spaghetti. I didn't have enough for a lasagna, but just enough for stuffed shells. I didn't take a picture because we were so hungry, we just gobbled it up. Anyway, here's what I did:

1 8oz pkg of cream cheese
2 C mozzarella cheese (divided)
Enough meat sauce (I used Ragu Roasted Garlic) to coat the bottom of an 8x8 dish, plus enough to cover the shells (maybe 3C, I didn't measure)
garlic powder
spinach
oregano
1 egg
12 jumbo shells partially cooked

Mix the cream cheese, 1 C mozzarella cheese, and egg thoroughly. Add garlic powder and oregano to taste (you might want to add this before the egg so you can taste it). Add spinach and mix well.

Put enough sauce to coat the bottom of dish. Stuff shells with cheese mixture and add to dish. Cover with remaining sauce and sprinkle 1 C mozzarella over sauce. Bake in 350 oven for about 20-25 minutes or until bubbly and cheese is slightly browned.


Enjoy.

Apple

12.29.2011

Pee Pee Teepee

I decided to make some pee pee teepees. I followed the directions found here I had a lot of fabric from some botched burpcloths that I didn't measure properly and didn't know what I was going to do with it. The material that I used is flannel inside and out. These things are so easy to make. I made 21 of them. Do I need 21? Nope...but I had enough fabric to make that many, so that's what I did :)


I didn't even bother to pin them after the initial pinning around the curve, which makes it that much faster to sew. Anyway, if you have a little sprayer, or know someone who does, these things are pretty cool.

Oh, the bowl I used was just a regular sized cereal bowl.

Happy Sewing!

Apple

12.27.2011

Burp Cloths

I actually made these a while ago, but never got around to posting them. A friend of mine is having a little one too, so I made a few for her. I got the template from here but made a couple of changes. On my first burp cloth I did it exactly as she said. It took too much time and hurt my hand from the constant clipping so I decided to sew it together. I like the way it looks much better and it was just easier for me.

Make sure you layer it right, or you'll be like me and want to scream because you sewed everything together only to realize that you put it together wrong in the first place and when you flip it out your batting is on the outside! I was so mad when that happened. I have to admit that I didn't sew for several days after that because I was so angry (I'm sure pregnancy hormones had something to do with that *wink*)

Anyway, here's what I did:

1. Place fabric right sides facing with batting on top.
2. Sew all the way around leaving approximately three inches opened at the top so you can flip it right side out.
3. Flip, then pin opening closed and sew all around closing the opening as you go. Then I sewed a line through the middle as suggested to catch the batting and voila! Done!

They are very nice and soft. I have made 16 so far, but I've cut out enough for 32. Apparently, I was very ambitious at one point :)

Here's how they look:

Front:


Back: 

Front and Back: 


Happy Sewing!

Apple

12.21.2011

Snowman Ornaments

I'm coming down to the last few ornaments now. I found the idea for this snowman here and thought it was cute. Now I just need a star for my topper...

Here are our snowmen:

This is mine (it looks like it got into a fight with another snowman though because I kept touching the paint while it was still wet):


This one belongs to my little one: 

This one is my hubby's: 

I have to admit, my husband surprised me with this whole ornament thing. He did a really great job creating his ornaments. I think his snowman is cuter than mine (shh...don't tell him I said that) :-) But the winner of overall cuteness goes to my little one. Those are some of the cutest things I've seen!


Apple


12.20.2011

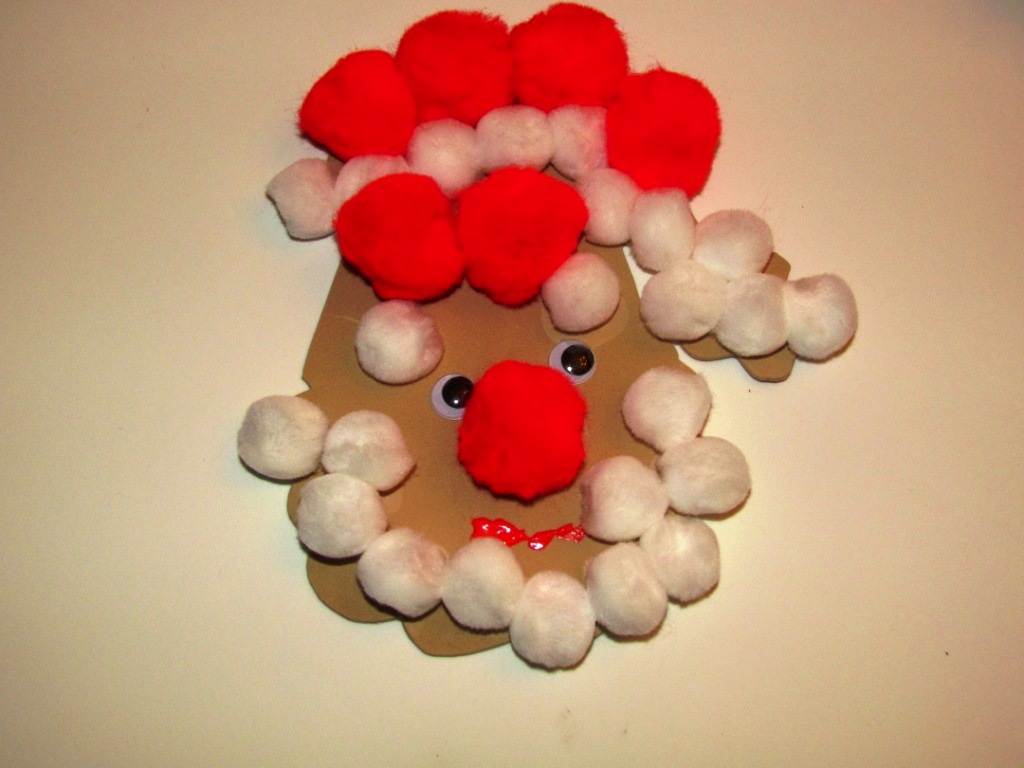
Santa Ornaments

Next on my list of ornaments is the Santa ornament. I think they look pretty hilarious. My husband's actually looks the best, but they still look funny. But that's what makes these sort of projects so fun and special. I used the template from here and again just copied it onto craft foam and cut it out. Here's what the finished product looks like:

This is my hubby's:


This is my little one's:


This is mine: 


Somehow my Santa ended up bearing a strange resemblance to Michael Jackson. I'm not really sure how that ended up happening, but it's there. Do you see it?


Apple

12.19.2011

Gingerbread Man Ornaments

We made Gingerbread Man ornaments! They look real. I don't know if it will really come across that way in pictures, but in person they look awesome! I'm very happy with the way they turned out. I used the template from here, resized it, copied it onto brown craft foam, and cut it out. I used puffy paint (dimensional paint) for the icing. It was a lot of fun doing these. Here's how they turned out:


This picture really doesn't due them justice. But make some for yourself and you'll see how cute they really are :-)

Apple